
With regular use and over a long period of time, driveways tend to get cracks and lose the smoothness here and there. One can get a new one done or try resurfacing the older one. Resurfacing is a technique where the top layer of the surface is removed and replaced with fresh concrete. This gives the pathway a new look and it fills up all pits and cracks. Concrete or driveway resurfacing is also a cheaper option than getting it completely replaced. This is one of the main reason why more people want to try resurfacing first and resort to replacement as the last option.
When to Go for Concrete or Driveway Resurfacing?
If the foundation of the driveway is good enough or if cracks and pits are occurring on the upper layer then resurfacing can easily fix the issue. However, if there is an issue with the foundation itself then the driveway needs to be replaced completely as proper foundation needs to be done again. In this case even if resurfacing is done, it will not last for the long term and cracks and pits might again appear shortly.
Steps Involved in Concrete or Driveway Resurfacing
It is important to wear waterproof gloves and proper eye protection when you are at work.
Clean the old surface: First step is to clean the old driveway thoroughly. Using a pressure washer with minimum 3500 psi helps to clean all dirt, broken concrete and other loose substances on the surface. Using a fan tip nozzle and holding the wand about 6 to 8 inches above the ground by slowly moving it over the entire surface area gets a very effective cleaning.
Repair the cracks and prepare surface: wash up all the cracks with water and repair them properly before pouring the concrete. Also, fill the driveway joints with weather stripping to prevent concrete covering the joints.
Mixing resurfacer: Now comes mixing the materials for concrete or driveway resurfacing. There are many kinds of resurfacer available locally and online, select the one that would suit your driveway. The ratio of resurfacer and water would be 7:1; that is 7 parts of resurfacer with 1 part of water. Put this in a 5-gallon bucket and mix it well. Pour the resurfacer into the water and mix. Use a mixer attached to a drill for better results. Check for an even concoction without any lumps. The consistency should be that of syrup. So, add water if it’s too thick or resurfacer if it becomes too thin to get the right consistency.
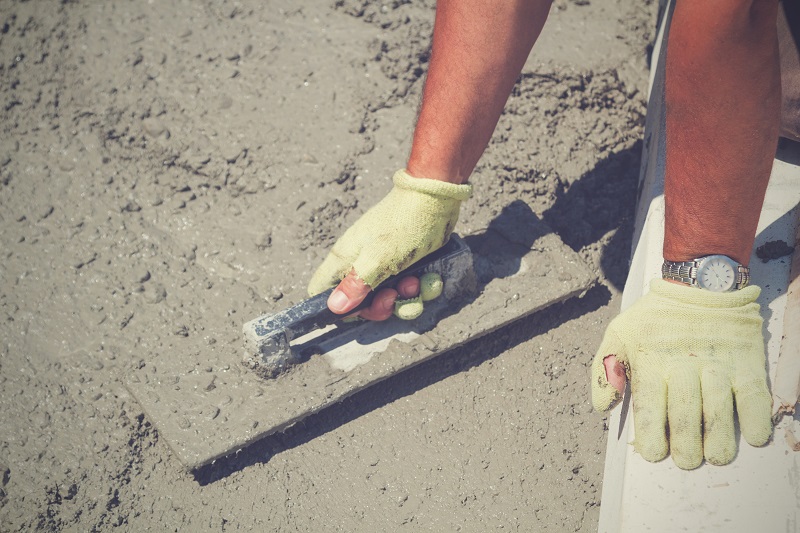
Add and apply resurfacer: next step is to add the concrete to fill up the recesses. Spread the resurfacer evenly to fill the gaps completely. Leave it for few hours to dry. Make sure that no one leaves any impression by standing over it and when the surface is hard enough, and then it is ready to unfurl the concrete on the entire driveway.
Resurfacing the entire driveway: one thing to keep in mind is that the mixture dries up in about 20 mins, so mix small portions and use them immediately. Divide the area into 1-foot wide blocks and start working on them one by one. First, pour the resurfacer and then spread them evenly using a squeegee with a long handle for better grip and long area coverage.
Apply a finish: an anti-slip finish can be achieved by using a broom. The strokes could be made in the same direction (preferably in the direction people will walk) to maintain uniformity. The broom can be applied after 5 minutes of spreading the concrete. Remove the weather stripping after a minimum of 20 minutes.
Concrete or driveway resurfacing for your driveway is ready to walk onto in about six hours. Cars and other vehicles can move on it after 24 hours.